Go to Store Locator > Settings to configure WP Store Locator.
The different sections on the settings page:
Google Maps API
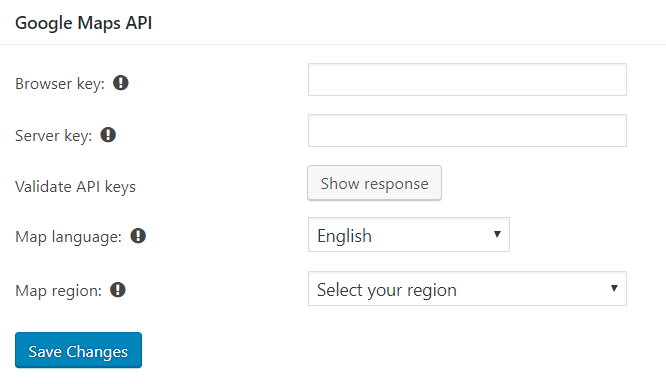
Server key A server key allows you to monitor the usage of the Google Maps Geocoding API.
Browser keyA browser key allows you to monitor the usage of the Google Maps JavaScript API.
Validate API keys This will test the provided API keys and show whether the Google Geocode API returned the expected data or an error message.
Map language You can set a fixed language for the textual information on the map.
If you leave it empty, the browser’s preferred language setting is used, which is recommended.
Map region This will bias the geocoding results towards the selected region.
If no region is selected the bias is set to the United States.
Search

Enable autocomplete? Enabling this option will add autocomplete support to the search input field.
Force zipcode only search? Enabling this option will force the Google Geocode API to assume the search input is a zip code. So searching for town / city names won’t work if this option is enabled.
Show the max results dropdown? Enabling this option will show a dropdown that allows users to limit the returned search results.
If this option is left unchecked, the default value from the “max search results” field is used to limit the search results.
Show the search radius dropdown? Enabling this option will show a dropdown that allows users to set the preferred search radius.
If this option is left unchecked, the default value from the “search radius options” field is used to limit the search radius.
Show the category dropdown? Enabling this option will show a dropdown that allows users to filter the search results by category.
Distance unit Use kilometers or miles to calculate the distance between the start point and the store locations.
Max search results The values that are used in the max results dropdown. Each value should be separated with a “,”.
The default value is set between [ ].
Search radius options The values that are used in the search radius dropdown. Each value should be separated with a “,”.
The default value is set between [ ].
Map

Attempt to auto-locate the user When this option is enabled the Geolocation API will try to obtain the user’s current location. If this is successful, the user’s current location is used as the start location on the map.
Load locations on page load If this option is enabled, the store locations are loaded as soon as the page loads.
Number of locations to show Set the number of store locations that are visible on page load.
This option is only visible if the “Load locations on page load” option is enabled.
Start point The default location that is used as the start point on the map.
Auto adjust the zoom level to make sure all markers are visible?This runs after a search is made, and makes sure all the returned locations are visible in the viewport.
Initial zoom level The initial zoom level of the map before any store locations are added to the map.
Max auto zoom level After all the locations are added to the map, the zoom level is automatically changed to make sure they are all visible.
This works well if the markers are spread out over a city. If they are placed close to each other and close to the start marker, then there is a big chance the map will zoom down to street level to make it fit on the map. If you’re zoomed in this far, you won’t be able to see much of the area surrounding the store location on the map. To prevent this from happening, you can restrict the maximum zoom level.
If you don’t mind the map occasionally zooming down to level 21 (street level), then set it to 21, but if you want to make sure the user always has an overview of the surrounding area, then a lower zoom level works better.


This option is also used to restrict the zoom level when the user clicks the “Zoom here” link in the info window.
The “Zoom here” link is only visible if the ‘Show a “zoom to” link in the info window?’ option is enabled.
Show the street view controls? Enabling this option will place the yellow street view icon on the top left corner of the map. You can drag the icon onto the map to switch to street view.
Show the pan controls? This will show a pan control to pan the map in either one direction or another.
Show the map type control? This control lets users toggle between the roadmap and satellite map type.
Enable scroll wheel zooming? Enabling this option allows users to zoom the map in or out with the scroll wheel.
Zoom control position Set the position of the zoom control to the left or right side of the map.
Zoom control style Set the style of the zoom control to small or large.
Map type Select one of the four available map types that you want to use for the map.
- Roadmap – displays the default road map view
- Satellite – displays satellite images
- Hybrid – displays a combination of normal and satellite views
- Terrain – displays a normal street map based on terrain information
Map style You can create your own custom map style by either writing your own style code, or you can use existing map styles from Snazzy Maps or Map Stylr.
Show credits? This will place a “Search provided by WP Store Locator” text with a link to wpstorelocator.co below the map.
User Experience

Store Locator height Set the height of the store locator.
Max width for the info window content Set the maximum allowed width for the info window content.
Search field width Set the width of the search field where users can enter their search query.
Search and radius label width Set the width of the search and radius label in the search bar.
Select store search template Select the template that you want to use for the [wpsl] shortcode.
Open links in a new window? If this box is checked, links in the store details will open in a new window.
Show a reset map button? This will place a “Reset” button in the top right corner.
Clicking the “Reset” button will restore the map to how it was when the page first loaded, but only if the viewport was changed.
When a user clicks on “Directions,” open a new window, and show the route on google.com/maps? If this option is enabled, the user is shown the driving directions on google.com/maps. Otherwise, they are shown on the store locator page itself.
Show a “More info” link in the store listings? This will place a “More info” link in the store listing or info window.
Clicking the link will show the description, phone, fax, email and opening hours.
Where do you want to show the “More info” details? Select the location where you want to show the “More info” details.
You can choose between showing it in the store listing or the info window.
This option is only visible if the ‘Show a “More info” link in the store listings?’ option is enabled.
Always show the contact details below the address in the search results? Enabling this option will show the phone / fax / email details below the address in the search results.
Make the store name clickable if a store URL exists? When a store URL exist, and this option is enabled, then the store name will link to the provided URL.
Make the phone number clickable on mobile devices? Enabling this option will make phone numbers clickable on mobile devices.
If street view is available for the current location, then show a “Street view” link in the info window? This will include a “Street view” link in the info window, but only if street view is available for the current location.
Show a “Zoom here” link in the info window? This will add a “Zoom here” link to the info window, enabling users to instantly zoom to the zoom level set under the Max auto zoom level setting.
On page load move the mouse cursor to the search field? Enabling this option will make sure that the mouse cursor is placed in the search field as soon as the page is loaded.
Use the default style for the info window? If this option is enabled the default info window is used, otherwise the InfoBox library is used.
The InfoBox library makes it easier to change the look and feel of the info window.
Hide the country in the search results? Enabling this option will hide the country in the search results.
Hide the distance in the search results? Enabling this option will hide the distance in the search results.
If a user hovers over the search results the store marker Select the effect that is applied to the store maker if the user hovers over the store details.
The corresponding store marker will either bounce up and down, open the info window, or not respond at all.
Address format Select the address format that you like to use.
Markers

Start location marker This marker is placed at the start location.
Store location marker This marker is used for the store locations.
Enable marker clusters? When this option is enabled, markers that are close to each other are merged into a single marker.
Exclude the start marker from the marker cluster? Enabling this option prevents the start marker from being included in a marker cluster, so it will always show up as a single marker.
Max zoom level If this zoom level is reached or exceeded, all markers are moved out of the marker cluster and shown as individual markers.
This option is only visible if the marker cluster option is enabled.
Cluster size The grid size of a cluster in pixels.
A larger number will result in a lower amount of clusters, and also make the algorithm run faster.
This option is only visible if the marker cluster option is enabled.
Store Editor

Default country Set the default value for the country field.
Map type for the location preview Select one of the four available map types for the location preview:
- Roadmap – displays the default road map view
- Satellite – displays satellite images
- Hybrid – displays a combination of normal and satellite views
- Terrain – displays a normal street map based on terrain information
Hide the opening hours? When this option is checked, the opening hours are not shown in the store editor nor on the store pages.
Opening hours input type Set the input type for the opening hours in the store editor to either “Dropdowns” or “Textarea”.
The default opening hours The default opening hours for each store.
Opening hours format Show the default opening hours in the 12 or 24 hr format.
Permalink

Enable permalink? If permalinks are enabled, each store location will have its own page.
Remove the front base from the permalink structure? The front base is set on the permalink settings page in the “Custom structure” field.
If a front base is set ( for example /blog/ ), then enabling this option will remove it from the store locator permalinks.
Store Slug The slug used for the store pages. The default is “stores.”
Category Slug The slug used for the store categories. The default is “store-categories.”
This option is only visible if the permalink option is enabled.
Labels

Change the labels that are used on the store locator pages.
Tools
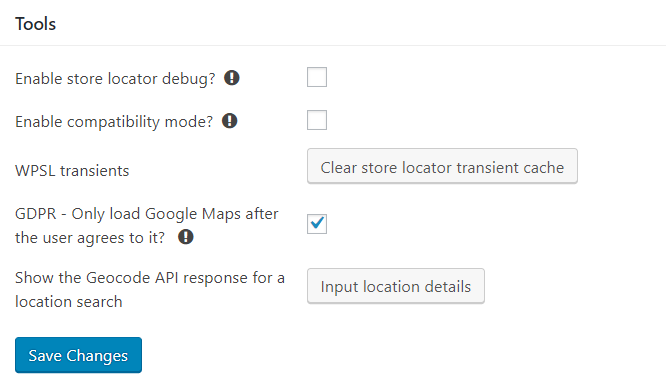
Enable store locator debug? This disables the WPSL transient cache.
Enable compatibility mode? If this error shows up in the browser console on the store locator page: You have included the Google Maps API multiple times on this page. This may cause unexpected errors, then enabling this option should fix it.
WPSL transients Clears the transient cache that holds the store locations shown on page load.
GDPR – Only load Google Maps after the user agrees to it? This option requires the Borlabs Cookie plugin, and will ask visitors for permission to load Google Maps. The required steps to make this work are explained here
Show the Geocode API response for a location search This will show the searched location on a map based on the current configuration together with the raw Google Geocode API response.